News
Non-Contact Gauging System Measures High/Low Threads


Add to my favorite
2022-12-06
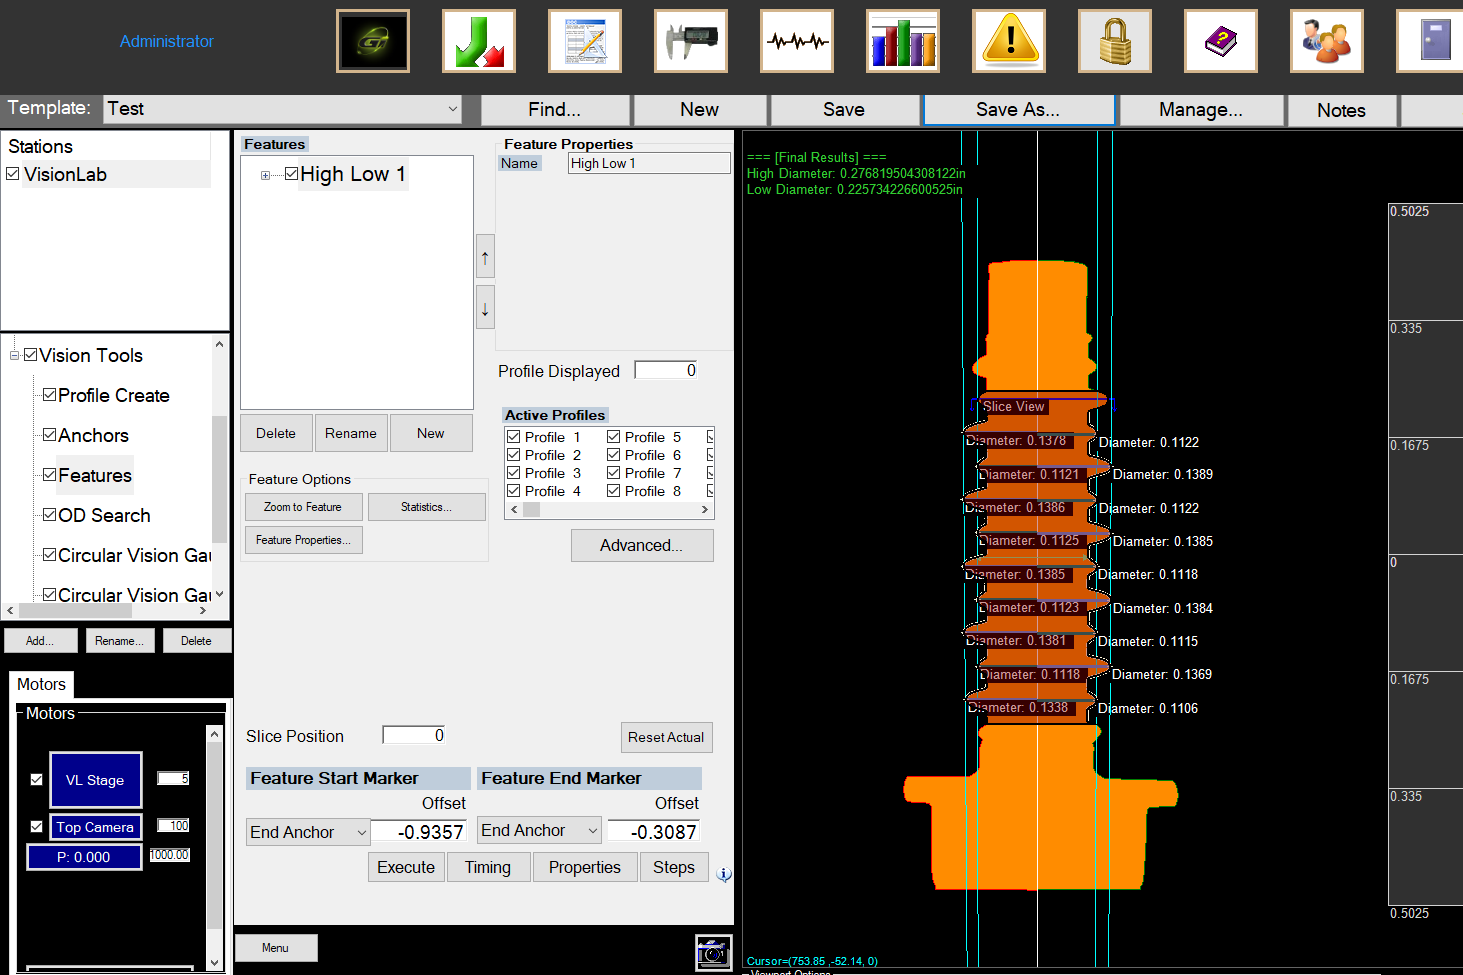
General Inspection, LLC recently added a new high/low thread measuring algorithm to its’ VisionLab. The 3D fastener gauging system, has the most comprehensive thread measurement capabilities, including all pertinent system-22 requirements, lobular shaped threads and now a specific algorithm for high/low threads.
Greg Nygaard said, “by popular demand, we’ve added a tool to our VisionLab system to make measuring high/low threads as simple as a press of a button”. The VisionLab allows manufacturers and distributors to measure all critical part features including high/low threads in less than 5 seconds.
In addition to threads, the VisionLab measures all profile features, including GD&T characteristics. An optional “end view” inspection measures and detects defects on both ends of parts including features such as: recesses, inner/outer diameters, through holes and counterbores. Optional surface control is used to detect visual detects, such as bad plating, thread patch presence/quality, as well as, measuring knurl width, gap and height. Optional slewing optics automatically tilt for an enhanced view into the radius of the threads to measure root radii and pitch diameter. Optional upper tooling and bit kit are available for uneven parts or parts with a recess drive.
For time savings, traceability and removing error, the VisionLab creates customized, thorough reports with graphs and data charts which can also be uploaded to 3rd party SPC packages.
美國General Inspection
VisionLab
扣件檢測
高低牙
fastener inspection
high low thread measurement
扣件
國際展會
惠達雜誌
匯達實業
外銷媒合
廣告刊登
螺絲五金
五金工具
紧固件
台灣扣件展
印度新德里螺絲展
越南河內螺絲展
墨西哥瓜達拉哈拉螺絲展
美國拉斯維加斯螺絲暨機械設備展
波蘭克拉科夫螺絲展
義大利米蘭螺絲展
德國司徒加特螺絲展
wire Dusseldorf
FASTENER FAIR INDIA
FASTENER FAIR VIETNAM
FASTENER FAIR MEXICO
FASTENER POLAND
FASTENER FAIR ITALY
FASTENER FAIR GLOBAL
FASTENER WORLD
READ NEXT

Subscribe


